# Chat Integration
# Discord Integration
# Create a Bot Account
- Ensure you're logged on to the Discord website (opens new window).
- Navigate to the application page (opens new window).
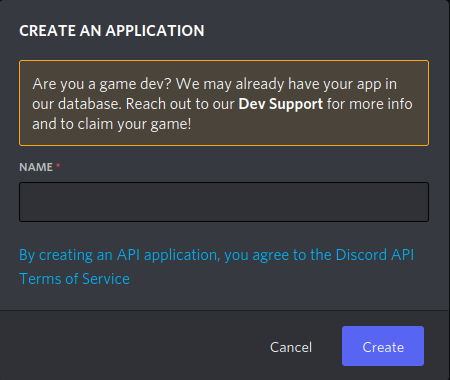
- Click on the "New Application" button.
- Give the application a name (for example, "Kitsu") and click "Create".
- Create a Bot User by navigating to the "Bot" tab and clicking "Add Bot". - Click "Yes, do it!" to continue.

You can add an icon for the bot by clicking the icon next to "Username". This icon will be used when the bot chats.
Ensure that "Public Bot" is ticked if you want others to invite your bot.

- Ensure the "Server Members Intent" is ticked to allow the bot to see other members.

Copy the token using the "Copy" button.
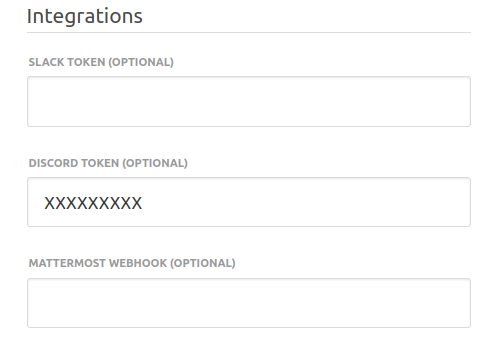
Paste the token in Kitsu's "Settings" under the text field "Discord token (optional)" and click "Save settings".
# Inviting Your Bot
Now that you've created a Bot User, you need to add it to a server. Follow these steps:
- Ensure you're logged on to the Discord website (opens new window).
- Navigate to the application page (opens new window).
- Click on your bot’s page.
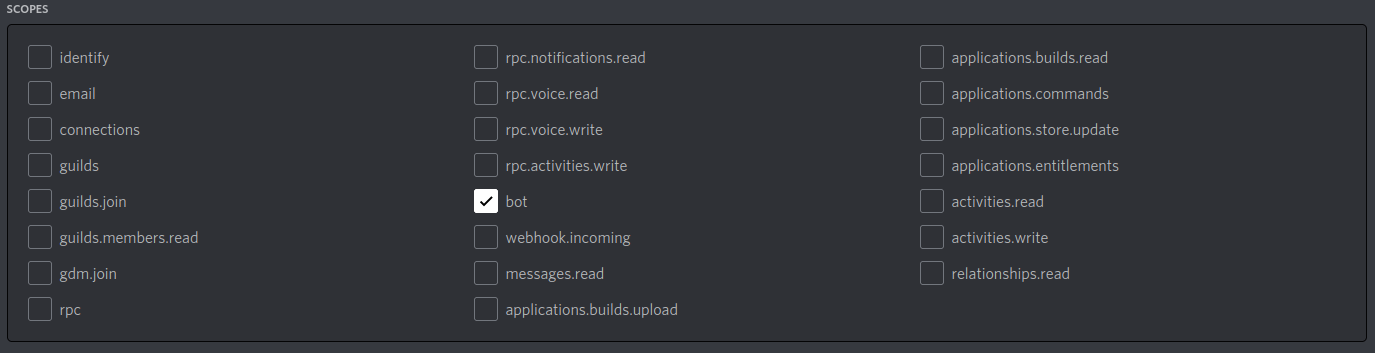
- Go to the "OAuth2" tab and then to "URL Generator".
- In "Scopes", tick "bot" only.
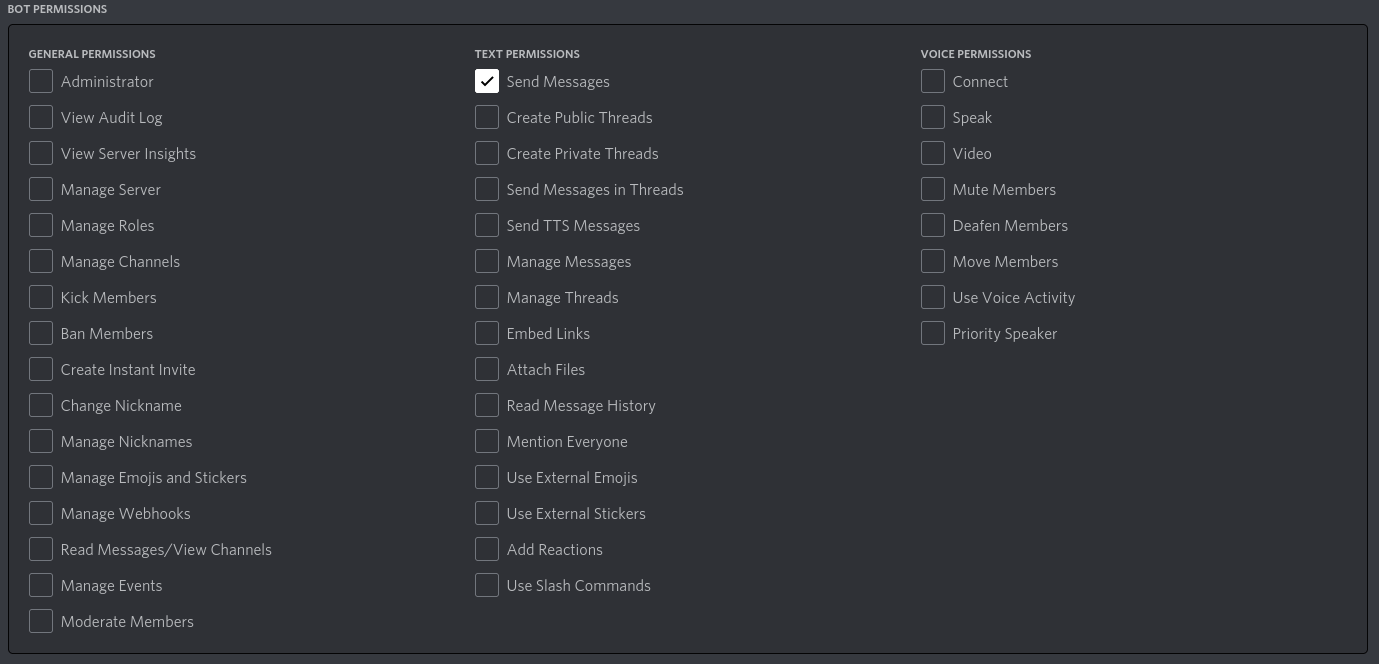
- In "Bot Permissions", tick "Send Messages" only.
- Use the resulting URL to add your bot to a server. Copy and paste the URL into your browser, choose a server to invite the bot to, and click "Authorize".
Note: To add the bot, the person needs "Manage Server" permissions.
Note: Users who want notifications enabled must be on the same server as the bot.
# Enable Discord Notifications
Each user can set notifications to be pushed to Discord in their profile. They need to switch "Discord notifications enabled" to "Yes" and enter their "Discord username" (formatted as username#number).

You're done!
# Slack Integration
The Slack integration requires creating a dedicated application in your Slack space. The following steps will guide you through the process.
# Create a Kitsu Application in Slack
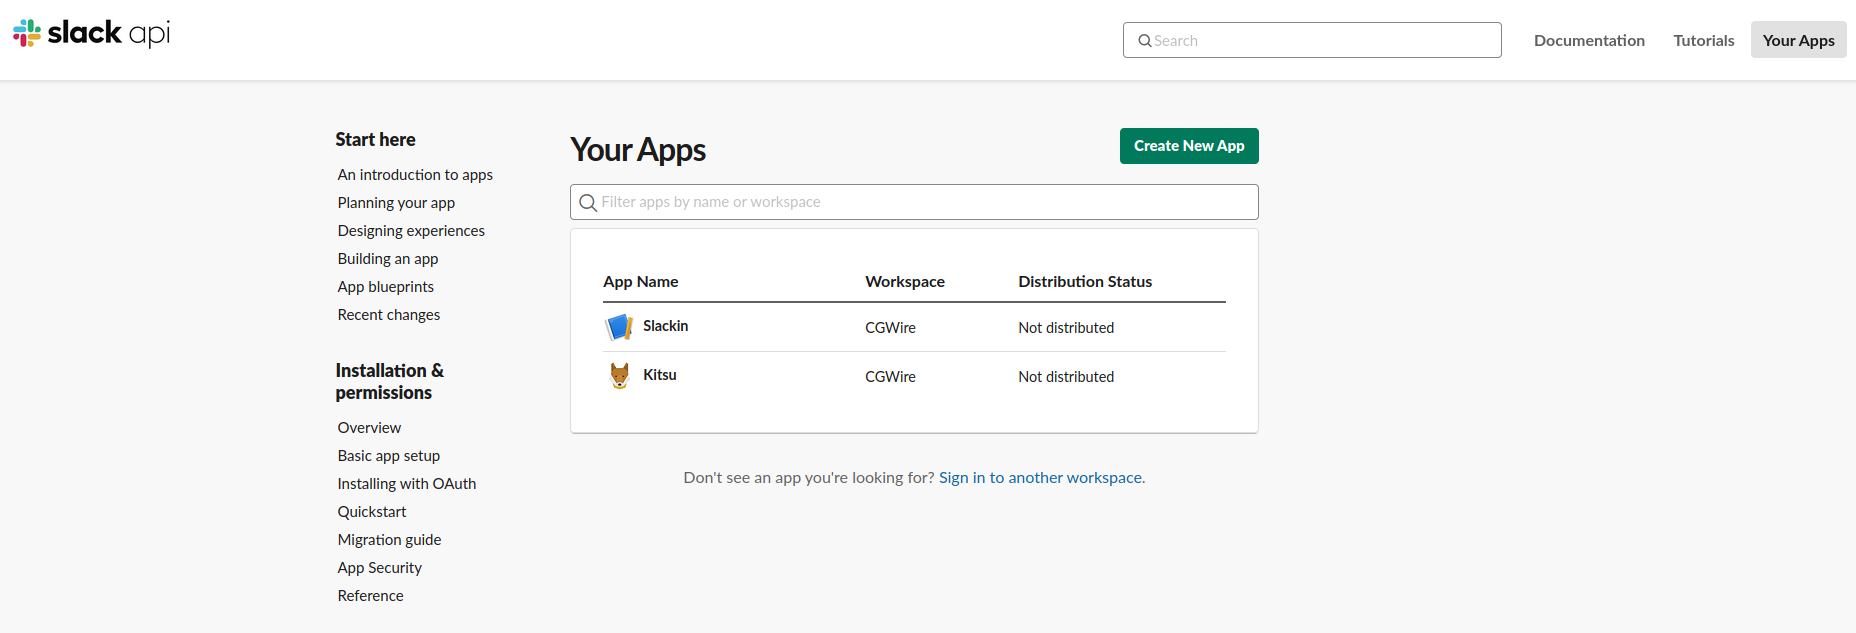
To start, connect to https://api.slack.com/apps (opens new window).
Click the "Create New App" button:
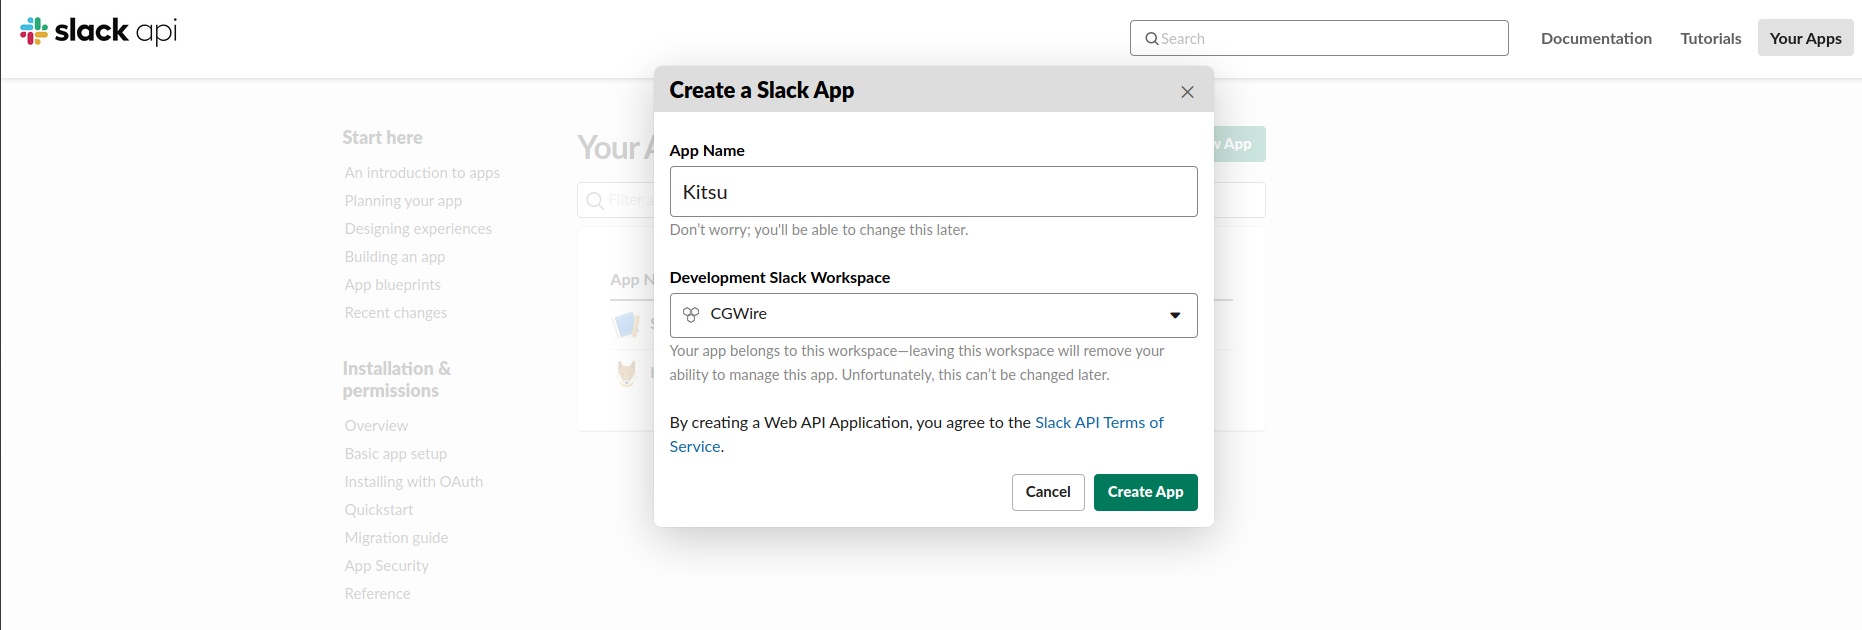
Enter "Kitsu" as the name and choose the workspace you want to link with your Kitsu instance:
# Set the Right Permissions
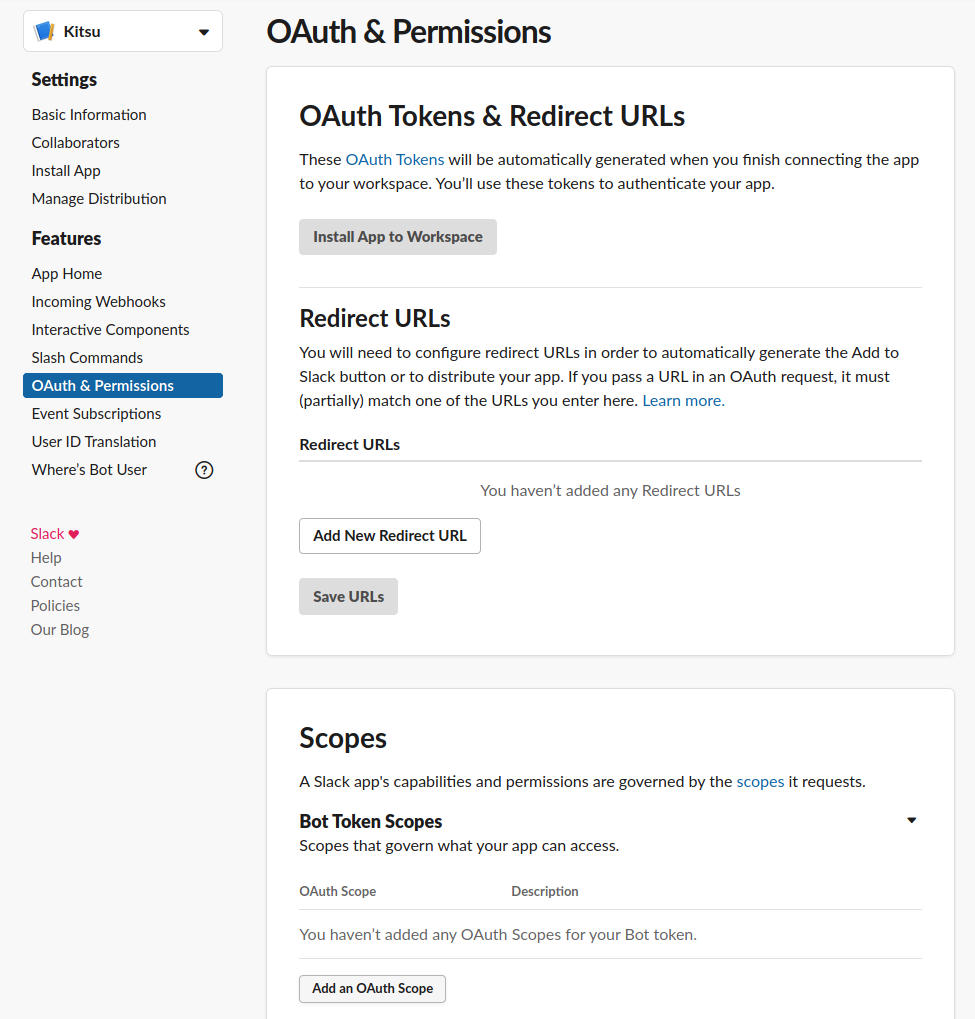
After creating the app, go to the app page by clicking on its name in the list. Go to the Basic Information section and click on the Permissions button at the bottom right:

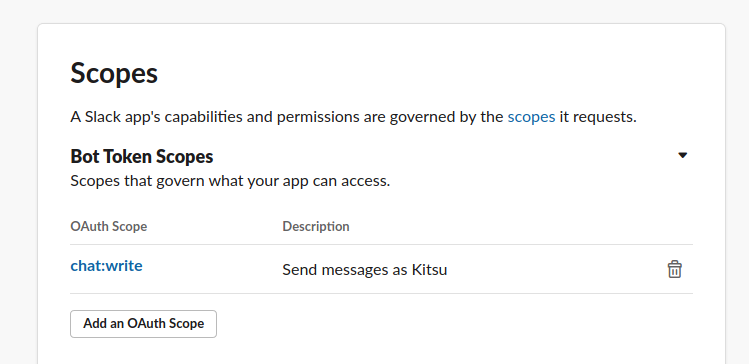
In the scopes section, add the required permission:
The required permission scope is chat:write:bot:
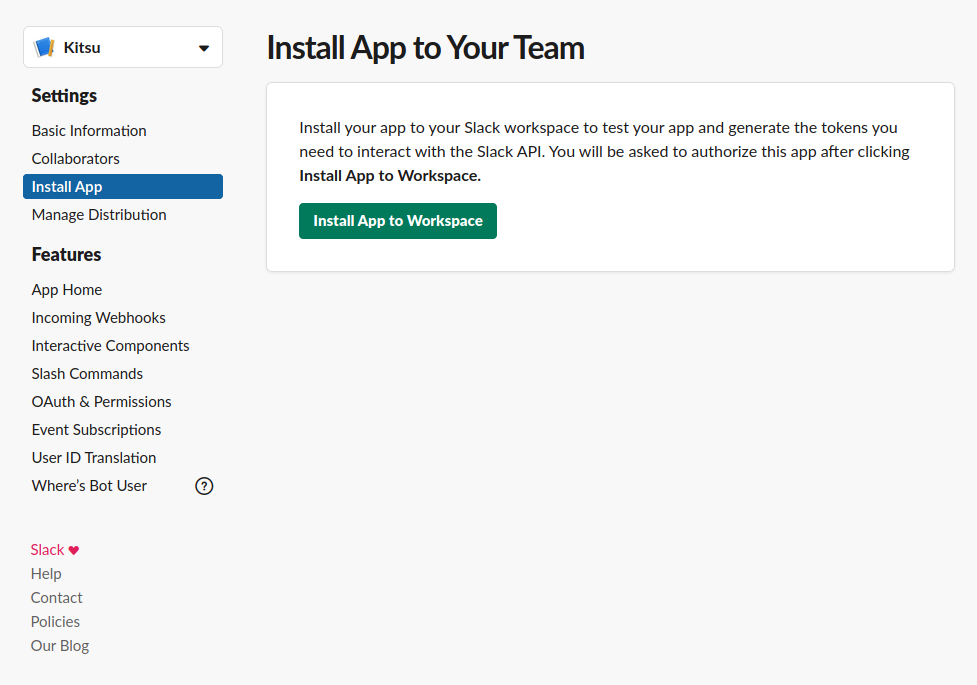
# Install the App in Your Workspace
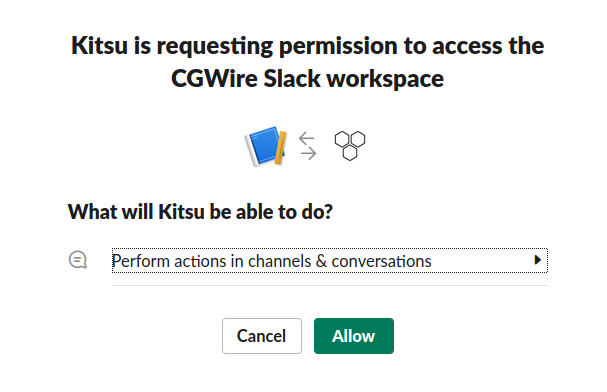
Proceed to the app installation in the workspace. Go to the Install App section and click on Install App To Workspace button to install:
Confirm the installation:
Your Kitsu Slack App is now up and running! You just need to link your Kitsu to the notifications sent to your Slack workspace.
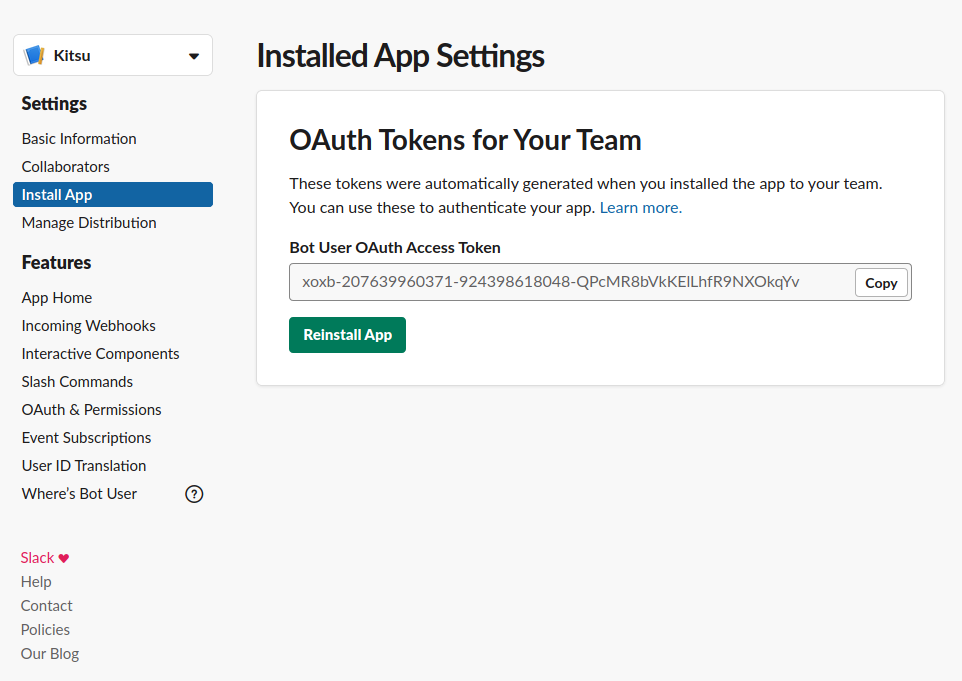
# Get the Token
Return to the Install App section. You should see the token needed to link your Kitsu instance to Slack:
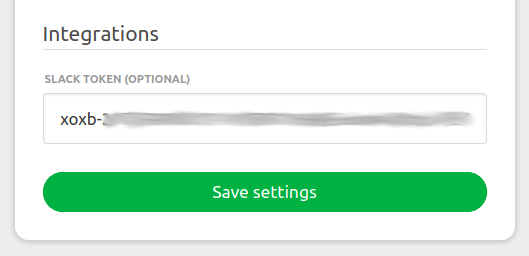
# Link Kitsu to Your New Slack Application
With your valid token, go to the settings page in Kitsu and enter the token:
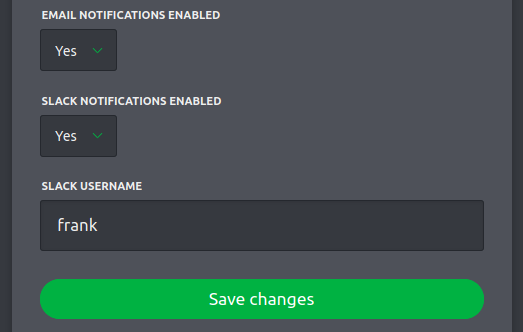
# Enable Slack Notifications in Your Profile
Finally, go to your profile section to turn on Slack notifications. Enter the Member ID you use on Slack, which you can find in your Slack profile by clicking on "More":


In your Kitsu profile, set the Slack notifications to "on" and enter your Slack nickname:
You can now enjoy notifications directly in your Slack workspace!

# Mattermost Integration
# Enable Incoming Webhooks, Custom Username, and Profile Picture for Webhooks
- Ensure you are logged in as a system admin account on your Mattermost server.
- Check if your Mattermost installation can receive incoming webhooks and set a custom username and profile picture for webhooks.
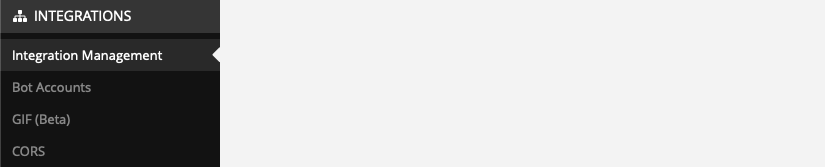
1. Go to "System Console" --> "Integrations" --> "Integration Management".
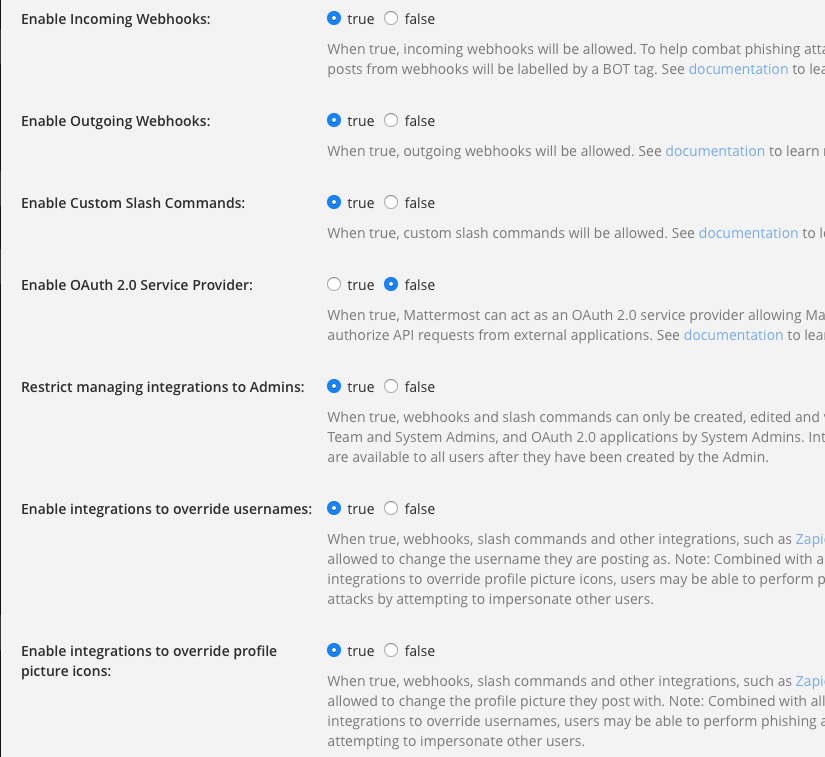
 2. Ensure the parameters "Enable incoming Webhooks", "Enable integrations to override usernames", and "Enable integrations to override profile picture icons" are set to true.
# Set a Webhook in Mattermost
- Ensure you are logged in as a system admin account on your Mattermost server.
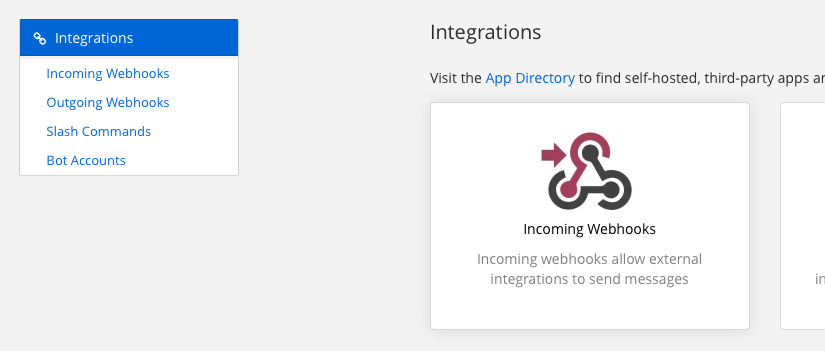
- Go to "Integrations" --> "Incoming Webhooks" --> "Add incoming Webhook".
- Create the incoming webhook:
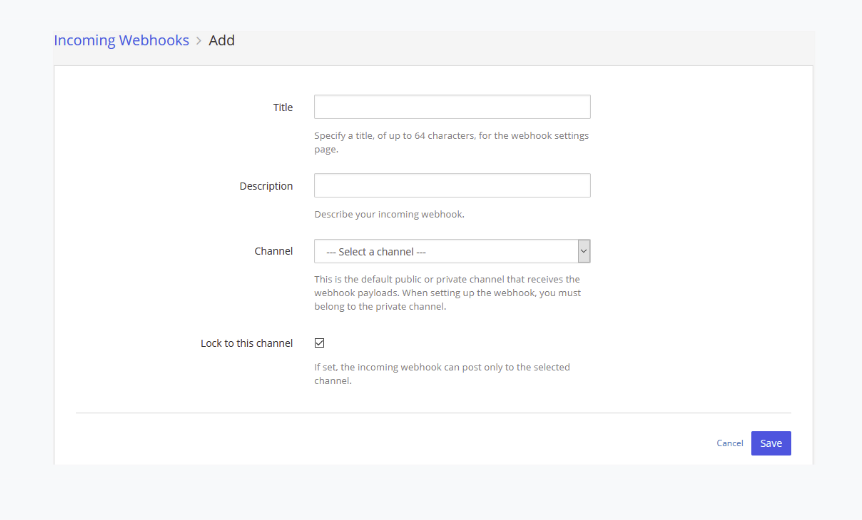
- Title: Kitsu
- Description: Kitsu
- Channel: You can create a new channel or use an existing one because the message will be sent to a user.
- Lock to this channel: Set to False.
- Username: Kitsu (this will be overridden by Kitsu).
- Profile Picture: Not important; it will be overridden by Kitsu.
After clicking "Save", Mattermost will generate a new URL. Copy this URL.
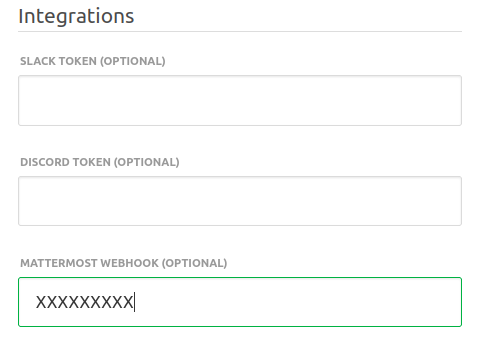
Paste the URL in the "Settings" of Kitsu under the text field "Mattermost Webhooks (optional)" and click "Save settings".
Note: Users who want notifications enabled must be on the same Mattermost server used in these steps.
# Enable Mattermost Notifications
Each user can set notifications to be pushed to Mattermost in their profile. They need to switch "Mattermost notifications enabled" to "Yes" and enter their "Mattermost username".

You're done!